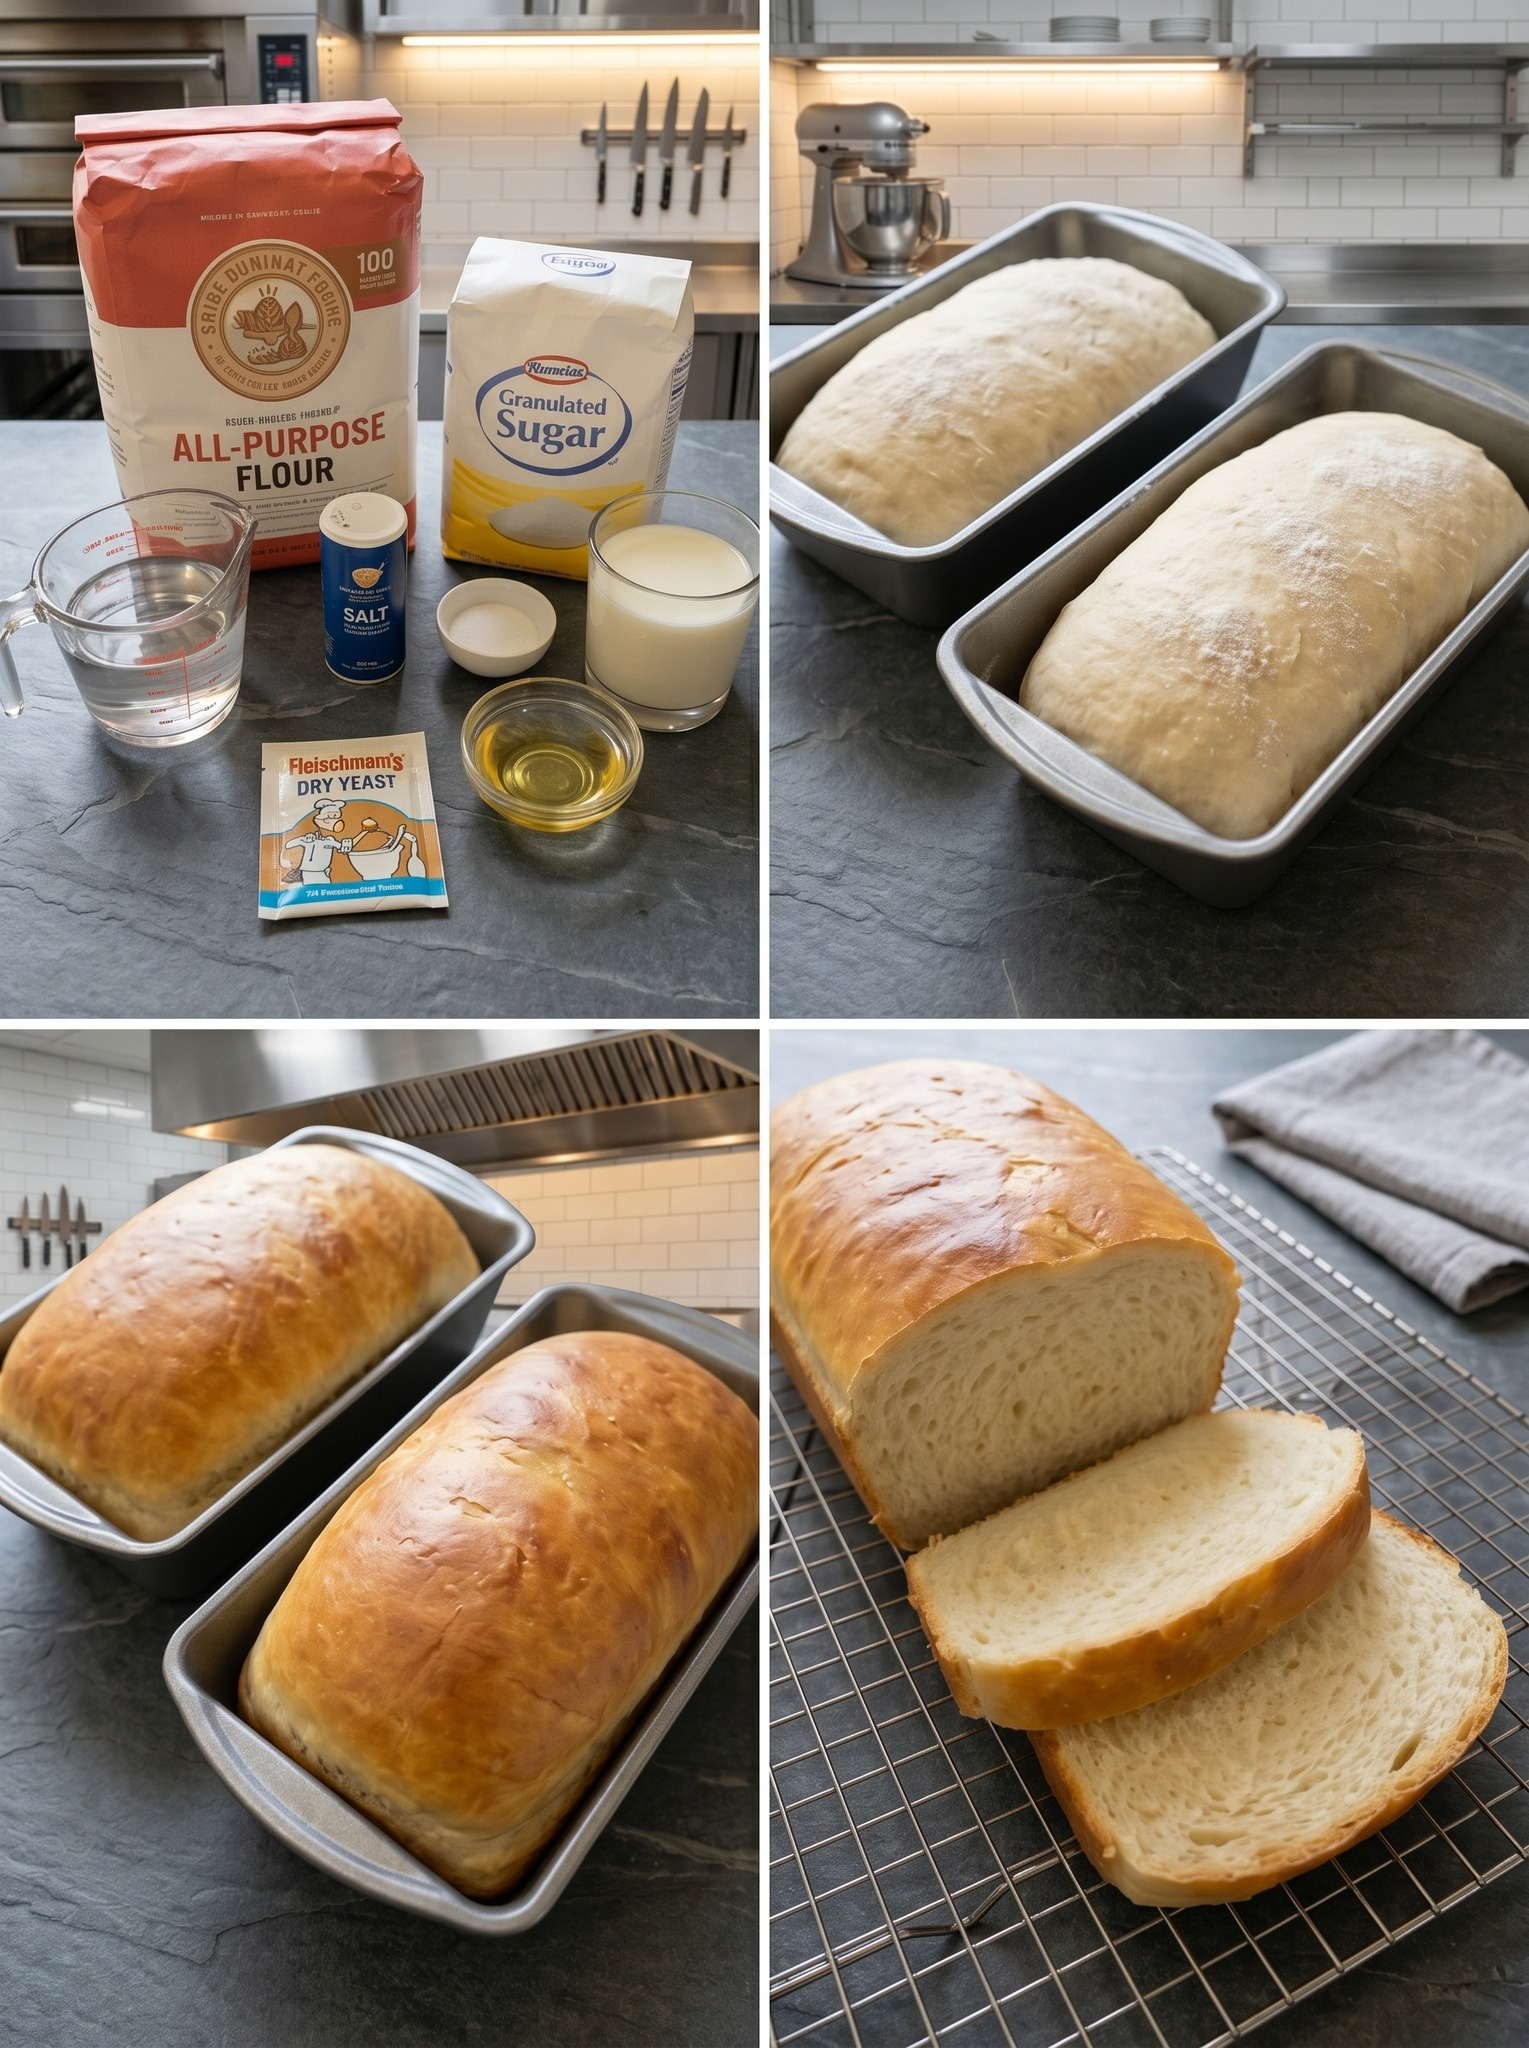
There’s nothing quite like the aroma of freshly baked homemade bread filling your kitchen. This classic Homemade White Bread recipe creates two soft, fluffy loaves with a beautiful golden crust and a tender interior that’s perfect for sandwiches, toast, or simply enjoying warm with butter. If you’ve never baked bread before, don’t worry—this recipe is beginner-friendly and delivers bakery-quality results every time.
Why You’ll Love This Recipe
- Soft and fluffy texture
- Perfect for sandwiches and toast
- Made with simple pantry ingredients
- Free from preservatives
- Great for freezing and meal prep
- Easy enough for beginners
Ingredients
Makes 2 loaves
- 6 to 6½ cups all-purpose flour
- 2¼ teaspoons active dry yeast (1 packet)
- 2 cups warm water (110°F/43°C)
- ¼ cup granulated sugar
- 1½ teaspoons salt
- ¼ cup vegetable oil
- ½ cup warm milk
Equipment Needed
- Large mixing bowl
- Measuring cups and spoons
- Two 9×5-inch loaf pans
- Clean kitchen towel
- Wire cooling rack
Step 1: Activate the Yeast
In a large mixing bowl, combine the warm water and sugar. Stir until the sugar dissolves completely. Sprinkle the active dry yeast over the top and allow it to sit for 5–10 minutes.
The yeast should become foamy and bubbly. This indicates that the yeast is active and ready to use. If no foam develops, the yeast may be expired or the water may have been too hot or too cold.
Step 2: Mix the Wet Ingredients
Once the yeast mixture is foamy, add the warm milk, vegetable oil, and salt. Stir well to combine all ingredients.
The combination of milk and oil helps create a soft, tender crumb while adding richness to the bread.
Step 3: Add the Flour
Begin adding flour one cup at a time, stirring after each addition. Continue until a soft dough begins to form.
The dough should be slightly sticky but manageable. Depending on humidity and flour type, you may not need the full amount of flour.
Avoid adding too much flour, as this can result in dense bread.
Step 4: Knead the Dough
Transfer the dough onto a lightly floured work surface.
Knead for 8–10 minutes until the dough becomes smooth, elastic, and slightly tacky.
You can test the dough by gently stretching a small piece. If it stretches thin enough to allow light through without tearing immediately, it has been kneaded sufficiently.
Proper kneading develops gluten, which gives the bread its structure and chewy texture.
Step 5: First Rise
Lightly grease a large bowl with oil.
Place the dough in the bowl and turn it once to coat all sides. Cover with a clean kitchen towel or plastic wrap.
Allow the dough to rise in a warm place for 1–1½ hours or until doubled in size.
During this stage, the yeast produces gas bubbles that help create the airy texture of the finished loaf.
Step 6: Punch Down the Dough
After the dough has doubled in size, gently punch it down to release excess air.
Transfer it to a clean surface and divide it into two equal portions.
This step redistributes the yeast and prepares the dough for shaping.
Step 7: Shape the Loaves
Flatten each dough portion into a rectangle.
Starting from the short end, roll the dough tightly into a log shape. Pinch the seams closed and tuck the ends underneath.
Place each shaped loaf into a greased 9×5-inch loaf pan.
The dough should fit comfortably in the pans while leaving room for expansion during the second rise.
Step 8: Second Rise
Cover the loaf pans loosely with a kitchen towel.
Allow the dough to rise again for approximately 30–45 minutes or until it rises about 1 inch above the rim of the pans.
This second rise creates the light, fluffy texture characteristic of homemade sandwich bread.
Avoid over-proofing, as the bread may collapse during baking.
Step 9: Bake the Bread
Preheat your oven to 375°F (190°C).
Place the loaf pans in the center rack and bake for 25–30 minutes.
The loaves should develop a deep golden-brown color and sound hollow when tapped on the bottom.
If you have an instant-read thermometer, the internal temperature should reach approximately 190–200°F (88–93°C).
Step 10: Cool Completely
Remove the bread from the oven and carefully transfer the loaves from the pans onto a wire cooling rack.
Allow the bread to cool for at least one hour before slicing.
Although it may be tempting to cut into warm bread immediately, cooling helps the interior structure set properly and prevents a gummy texture.
Tips for Perfect Homemade Bread
Use Fresh Yeast
Always check the expiration date on your yeast. Fresh yeast produces a better rise and more consistent results.
Measure Flour Correctly
Too much flour can make bread dense and dry. Spoon flour into measuring cups and level it off rather than scooping directly from the bag.
Create a Warm Rising Environment
If your kitchen is cool, place the covered dough in an oven with only the oven light turned on. The gentle warmth encourages proper rising.
Don’t Rush the Process
Bread making requires patience. Allow the dough enough time to rise fully during both proofing stages.
Brush with Butter
For an extra-soft crust, brush the tops of the hot loaves with melted butter immediately after baking.
Serving Suggestions
This homemade white bread is incredibly versatile.
Serve it:
- Toasted with butter and jam
- As sandwich bread
- With soups and stews
- For grilled cheese sandwiches
- As French toast
- With peanut butter and honey
- Alongside pasta dishes
Its soft texture and mild flavor make it suitable for almost any meal.
Storage Instructions
Store cooled bread in an airtight container or bread bag at room temperature for up to 4 days.
Avoid refrigerating bread, as refrigeration tends to dry it out more quickly.
For longer storage, freeze whole loaves or sliced bread for up to 3 months. Simply thaw at room temperature before serving.
Frequently Asked Questions
Can I Use Bread Flour Instead?
Yes. Bread flour contains more protein and produces a slightly chewier texture with better structure.
Why Is My Bread Dense?
Dense bread is usually caused by:
- Too much flour
- Insufficient kneading
- Old yeast
- Not enough rising time
Can I Make This Recipe By Hand?
Absolutely. A stand mixer is helpful but not necessary. Hand kneading works perfectly.
Can I Add Other Ingredients?
Yes. Try adding:
- Honey
- Herbs
- Garlic
- Cheese
- Seeds
- Oats
These additions can create delicious variations while maintaining the same basic bread structure.
Final Thoughts
Few things compare to a freshly baked loaf of homemade bread. This easy Homemade White Bread recipe delivers soft slices, a beautiful golden crust, and a flavor that’s far superior to store-bought bread. Whether you’re making sandwiches, serving it with dinner, or enjoying a warm slice straight from the loaf, this recipe is one you’ll return to again and again.
Bake a batch today and enjoy the simple pleasure of fresh, homemade bread right from your own kitchen. 🍞✨

Leave a Reply