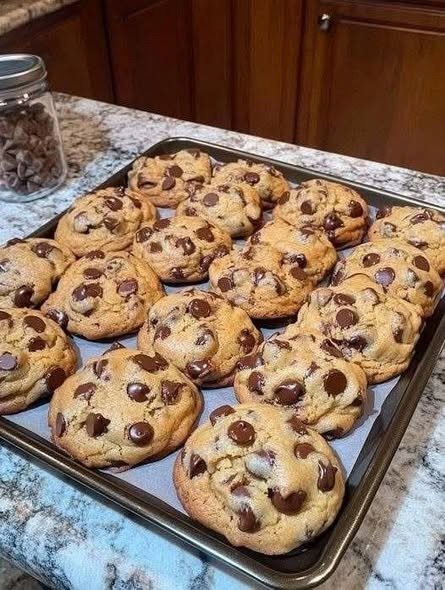
There’s something magical about a tray of freshly baked chocolate chip cookies. The warm aroma filling the kitchen, the melted chocolate chips, and the soft buttery center make them one of the most loved desserts in the world. If you are looking for the perfect homemade chocolate chip cookie recipe for your blog, this bakery-style recipe is exactly what you need. These cookies are thick, chewy, soft in the middle, slightly crispy on the edges, and loaded with rich chocolate chips just like the cookies shown in the picture above.
Whether you are baking for family gatherings, tea time, birthdays, or simply satisfying your sweet cravings, these cookies will become your favorite homemade treat. The best thing about this recipe is that it uses simple ingredients available in almost every kitchen.
Why You’ll Love These Cookies
These chocolate chip cookies are:
- Soft and chewy inside
- Crispy around the edges
- Packed with chocolate chips
- Easy to make at home
- Perfect for beginners
- Better than bakery cookies
The golden-brown texture and gooey chocolate make them absolutely irresistible. Pair them with a glass of milk or a cup of coffee for the perfect snack.
Ingredients
Here’s everything you need to make these delicious cookies:
- 2 ¼ cups all-purpose flour
- 1 teaspoon baking soda
- ½ teaspoon salt
- 1 cup unsalted butter (softened)
- ¾ cup brown sugar
- ¾ cup white sugar
- 2 large eggs
- 2 teaspoons vanilla extract
- 2 cups chocolate chips
- Optional: ½ cup chopped walnuts or pecans
Step-by-Step Instructions
Step 1: Prepare the Oven
Preheat your oven to 350°F (175°C). Line a baking tray with parchment paper to prevent sticking and ensure even baking.
Step 2: Mix Dry Ingredients
In a medium bowl, combine the flour, baking soda, and salt. Mix well and set aside.
Step 3: Cream Butter and Sugars
In a large mixing bowl, beat the softened butter, brown sugar, and white sugar together until light and fluffy. This step is important because it helps create soft and chewy cookies.
Step 4: Add Eggs and Vanilla
Add the eggs one at a time, mixing well after each addition. Stir in the vanilla extract for extra flavor.
Step 5: Combine Everything
Slowly add the dry ingredients into the wet mixture. Mix until a smooth cookie dough forms. Do not overmix.
Step 6: Add Chocolate Chips
Fold in the chocolate chips gently. You can also add nuts if you like a crunchy texture.
Step 7: Shape the Cookies
Use a spoon or ice cream scoop to place cookie dough balls onto the prepared baking tray. Leave enough space between each cookie because they spread while baking.
Step 8: Bake
Bake for 10–14 minutes or until the edges turn golden brown. The centers may look slightly soft, but they will continue to cook as they cool.
Step 9: Cool and Serve
Allow the cookies to cool on the tray for 5 minutes before transferring them to a wire rack. Serve warm for the best gooey chocolate experience.
Tips for Perfect Chocolate Chip Cookies
Use Brown Sugar
Brown sugar adds moisture and creates a chewy texture.
Don’t Overbake
Cookies continue baking after coming out of the oven. Remove them when the center still looks slightly soft.
Chill the Dough
For thicker bakery-style cookies, chill the dough for at least 30 minutes before baking.
Use Quality Chocolate
Good-quality chocolate chips make a huge difference in flavor.
Storage Tips
- Store cookies in an airtight container for up to 5 days.
- Freeze cookie dough for up to 3 months.
- Reheat cookies in the microwave for 10 seconds to make them soft again.
Serving Ideas
These cookies taste amazing with:
- Cold milk
- Hot coffee
- Vanilla ice cream
- Hot chocolate
You can also turn them into ice cream sandwiches for an extra special dessert.
Final Thoughts
Homemade chocolate chip cookies are timeless, comforting, and incredibly delicious. This easy recipe gives you bakery-style cookies with crispy edges, soft centers, and gooey chocolate in every bite. Whether you’re baking for guests or simply treating yourself, these cookies are guaranteed to impress everyone.
If you try this recipe, your kitchen will smell heavenly, and your family will keep asking for more. Add this recipe to your blog along with your cookie photo, and it will definitely attract dessert lovers and baking enthusiasts.
Happy Baking! 🍪

Leave a Reply