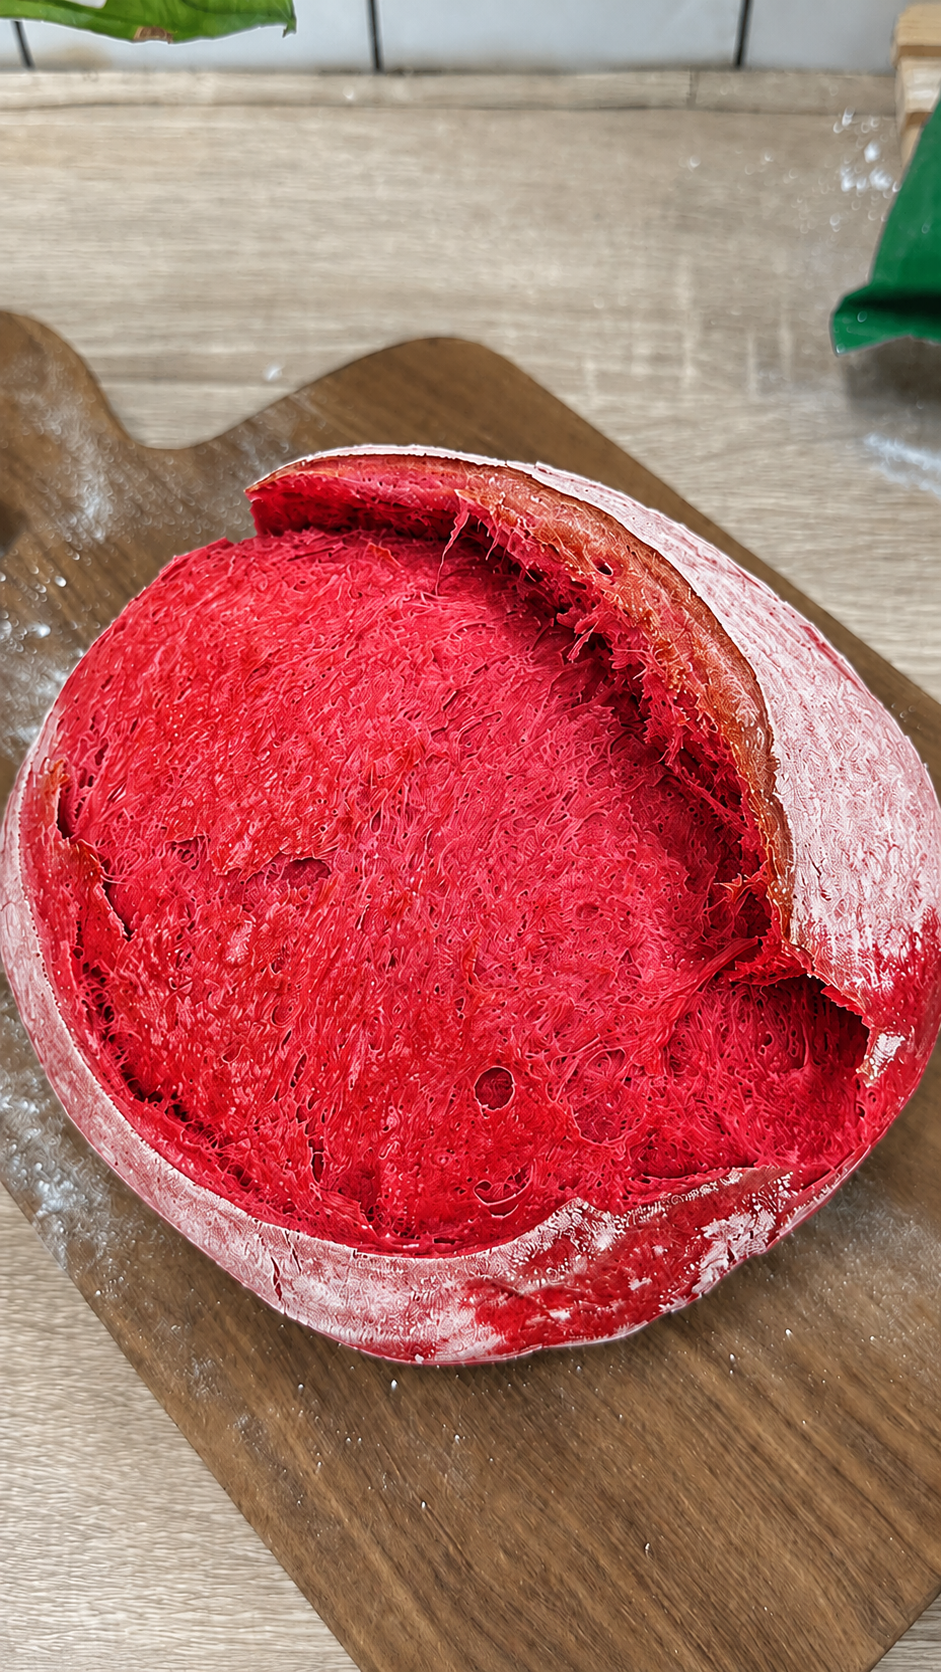
If you’re looking for a bread recipe that is both visually stunning and incredibly delicious, this Ruby Red Artisan Sourdough Bread is the perfect choice. With its vibrant red color, rustic crust, and soft airy crumb, this bread is guaranteed to grab attention. Whether you’re baking for a special occasion, creating content for social media, or simply experimenting with colorful artisan breads, this recipe delivers amazing results every time.
The beautiful red color can be achieved using natural beetroot powder or high-quality red food coloring. The result is a loaf that looks unique while maintaining the classic flavor and texture of traditional artisan sourdough bread.
Why You’ll Love This Bread
- Eye-catching ruby red color
- Crispy artisan-style crust
- Soft and airy interior
- Perfect for sandwiches and toast
- Great for special events and celebrations
- Easy to customize with natural or artificial coloring
Ingredients
For the Dough
- 500g bread flour
- 350g warm water
- 100g active sourdough starter
- 10g salt
- 2 tablespoons beetroot powder or red food coloring
- Extra flour for dusting
Equipment Needed
- Large mixing bowl
- Dutch oven or baking stone
- Banneton basket or bowl lined with a towel
- Dough scraper
- Sharp knife or bread lame
Step 1: Prepare the Dough
In a large bowl, combine the warm water and active sourdough starter. Stir until the starter is fully dissolved.
Add the beetroot powder or red coloring and mix thoroughly until the water becomes evenly colored. This step ensures the color is distributed throughout the dough.
Gradually add the bread flour and mix until a shaggy dough forms. Cover the bowl and allow it to rest for 30 minutes. This process, known as autolyse, helps improve gluten development and overall bread texture.
Step 2: Add Salt
After the resting period, sprinkle the salt over the dough. Wet your hands slightly and begin folding the dough over itself until the salt is fully incorporated.
The dough may feel sticky at first, but it will become smoother as you continue working with it.
Step 3: Stretch and Fold
Over the next two hours, perform a series of stretch-and-folds every 30 minutes.
To do this:
- Grab one side of the dough.
- Stretch it upward.
- Fold it over the center.
- Rotate the bowl and repeat.
Perform four folds during each session.
These folds strengthen the gluten structure and help create the beautiful open crumb artisan breads are known for.
Step 4: Bulk Fermentation
Cover the dough and allow it to ferment at room temperature for 4 to 6 hours.
The exact time depends on the temperature of your kitchen. The dough should increase noticeably in volume and become light and airy.
You will notice bubbles forming beneath the surface, which is a sign that fermentation is progressing properly.
Step 5: Shape the Dough
Lightly flour your work surface and gently turn out the dough.
Shape it into a round loaf by folding the edges toward the center and creating surface tension.
Avoid pressing out too much air. Those trapped gases are responsible for the airy interior of the finished loaf.
Place the shaped dough seam-side up into a floured banneton basket.
Step 6: Cold Proof
Cover the basket and refrigerate the dough overnight for 8 to 12 hours.
Cold proofing improves flavor, strengthens the dough structure, and helps create the dramatic artisan-style oven spring.
This step also enhances the rich red color of the dough.
Step 7: Preheat the Oven
The next day, place your Dutch oven inside the oven and preheat to 475°F (245°C).
Allow the Dutch oven to heat for at least 30 minutes.
A properly heated Dutch oven creates steam, which is essential for developing a crispy crust.
Step 8: Score the Dough
Carefully transfer the dough onto parchment paper.
Using a sharp knife or bread lame, make a deep slash across the top.
Scoring controls how the bread expands during baking and creates the signature artisan appearance.
Step 9: Bake
Place the dough into the hot Dutch oven.
Cover with the lid and bake for 25 minutes.
Remove the lid and continue baking for another 20 to 25 minutes until the crust is deeply colored and crisp.
The internal temperature should reach approximately 205°F to 210°F (96°C to 99°C).
Step 10: Cool Completely
Transfer the bread to a cooling rack.
Allow it to cool for at least one hour before slicing.
Although it may be tempting to cut into it immediately, cooling allows the crumb to finish setting and improves the overall texture.
Serving Suggestions
This Ruby Red Artisan Sourdough Bread pairs wonderfully with:
- Cream cheese
- Butter and honey
- Avocado toast
- Grilled sandwiches
- Charcuterie boards
- Soup and salad meals
Its striking appearance also makes it an excellent centerpiece for holiday tables and special gatherings.
Tips for Success
- Use an active sourdough starter for the best rise.
- Avoid adding too much extra flour.
- Refrigerate overnight for improved flavor.
- Use beetroot powder for a natural red color.
- Let the bread cool fully before slicing.
Storage
Store the bread at room temperature in a paper bag or bread box for up to three days.
For longer storage, slice and freeze the loaf in an airtight container. Frozen slices can be toasted directly from the freezer.
Final Thoughts
Ruby Red Artisan Sourdough Bread is more than just a loaf of bread—it’s a showpiece. The vibrant red crumb, rustic crust, and incredible flavor make it a memorable baking project for both beginners and experienced bakers. Whether served at a family dinner, featured on a food blog, or shared on social media, this unique artisan bread is sure to impress everyone who sees and tastes it.

Leave a Reply