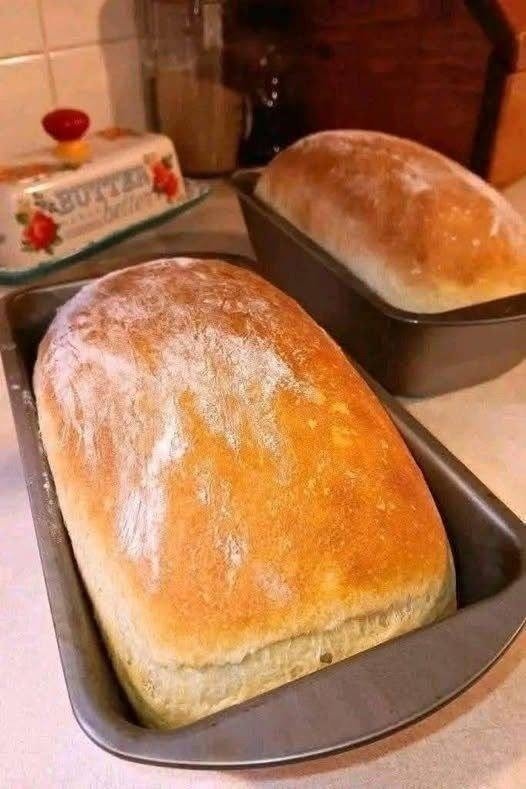
There’s something truly magical about baking homemade sourdough bread. From the moment you mix together flour, water, and a lively sourdough starter to the satisfying crackle of a freshly baked loaf cooling on the counter, every step of the process is rewarding. Unlike bread made with commercial yeast, sourdough develops its flavor naturally through wild yeast and beneficial bacteria, creating a loaf with a crisp golden crust, a soft and airy crumb, and the signature tangy taste that bread lovers adore.
Although sourdough baking has a reputation for being difficult, it’s actually more about patience than complexity. Once you understand the basics of fermentation, dough handling, and proper baking techniques, making bakery-quality sourdough at home becomes an enjoyable and satisfying routine. The process may take time, but most of that time is completely hands-off while nature does the work.
Whether you’re an experienced baker looking to perfect your technique or a beginner eager to bake your very first artisan loaf, this comprehensive guide will walk you through every stage of the process. By following these simple steps and understanding why each stage matters, you’ll be able to create a beautiful homemade sourdough loaf that rivals those from your favorite bakery.
Why You’ll Love This Homemade Sourdough Bread Recipe
Homemade sourdough offers many advantages over store-bought bread.
- Crispy artisan-style crust
- Soft, open, and airy crumb
- Naturally fermented for incredible flavor
- Made without commercial yeast
- Longer shelf life than regular bread
- Easier to digest for many people
- Perfect for sandwiches, toast, and soups
- Free from unnecessary preservatives
- Great baking project for weekends
Few things compare to the pride of slicing into a loaf you’ve nurtured from start to finish.
What Makes Sourdough Bread Special?
Unlike conventional bread that relies on instant or active dry yeast, sourdough uses a naturally fermented starter containing wild yeast and beneficial bacteria. During fermentation, these microorganisms slowly develop flavor, strengthen the dough, and create the beautiful texture sourdough is famous for.
This slow fermentation not only enhances taste but also improves texture and can make the bread easier to digest for some people. The result is a loaf with a chewy interior, crisp crust, and rich, slightly tangy flavor that’s impossible to achieve with commercial yeast alone.
Ingredients
This recipe makes one artisan sourdough loaf.
For the Dough
- 100g active sourdough starter
- 375g warm water (75–80°F / 24–27°C)
- 450g bread flour
- 50g whole wheat flour
- 10g fine sea salt
Using a digital kitchen scale is highly recommended because accurate measurements are essential for successful sourdough baking.
Kitchen Equipment
Before starting, gather these tools:
- Digital kitchen scale
- Large mixing bowl
- Bench scraper
- Proofing basket (banneton) or bowl lined with a floured towel
- Razor blade or bread lame for scoring
- Dutch oven with lid
- Cooling rack
Step-by-Step Instructions
Step 1: Build the Levain
Several hours before mixing your dough, feed your sourdough starter to create an active levain.
Mix:
- 20g starter
- 100g warm water
- 100g bread flour
Stir well, cover loosely, and let it ferment at room temperature for 4–8 hours.
The levain is ready when it has doubled in size, is bubbly throughout, has a slightly domed surface, and passes the float test by floating in warm water.
Step 2: Autolyse the Dough
In a large mixing bowl, combine:
- 450g bread flour
- 50g whole wheat flour
- 375g warm water
Mix until no dry flour remains.
Cover the bowl and allow the dough to rest for 30–60 minutes.
This stage, known as the autolyse, allows the flour to fully absorb water and begins gluten development naturally, resulting in stronger dough and a lighter crumb.
Step 3: Incorporate the Starter and Salt
Add the active levain to the hydrated dough.
Using wet hands, gently pinch, stretch, and fold the dough until the starter is fully incorporated.
Cover and rest for another 30 minutes.
Next, sprinkle the sea salt over the dough with a teaspoon of water. Continue folding and squeezing until the salt is evenly distributed.
The dough should become smoother and more cohesive after mixing.
Step 4: Bulk Fermentation
Bulk fermentation is where the dough develops flavor, strength, and structure.
Over the next 4–6 hours, keep the dough covered at room temperature.
Every 30 minutes during the first 2–3 hours, perform a set of gentle coil folds.
To do this:
- Wet your hands.
- Lift one side of the dough.
- Fold it gently over itself.
- Rotate the bowl and repeat several times.
Each fold strengthens the gluten network while preserving the gas bubbles forming inside the dough.
Instead of relying solely on the clock, watch your dough carefully.
It’s ready when it has expanded by about 30–50%, feels light and airy, has visible bubbles, and jiggles slightly when the bowl is shaken.
Step 5: Shape the Dough
Lightly flour your work surface and gently turn out the dough.
Using a bench scraper, form it into a loose round.
Allow it to rest uncovered for about 20–30 minutes.
This bench rest relaxes the gluten, making final shaping easier.
For the final shape:
- Fold the bottom toward the center.
- Fold both sides inward.
- Fold the top down.
- Flip the dough over.
Using a bench scraper, gently drag the dough across the work surface to build surface tension.
Proper shaping helps create excellent oven spring and a beautiful round loaf.
Step 6: Overnight Cold Proof
Dust your banneton generously with a mixture of rice flour and all-purpose flour.
Place the shaped dough inside with the seam facing upward.
Cover and refrigerate for 12–16 hours.
This cold fermentation slows yeast activity while allowing flavor to continue developing, resulting in the classic sourdough tang and improved texture.
Step 7: Bake the Bread
Place your Dutch oven into the oven and preheat to 475°F (245°C) for at least 45–60 minutes.
A fully heated Dutch oven is essential for creating steam and achieving maximum oven spring.
Carefully remove the dough from the refrigerator.
Turn it onto parchment paper.
Using a razor blade or bread lame, score the top with one confident slash about half an inch deep.
Transfer the dough into the hot Dutch oven.
Bake covered for 25 minutes.
Then remove the lid, reduce the oven temperature to 450°F (230°C), and bake for another 20–25 minutes until deeply golden brown.
The crust should sound hollow when tapped and have a rich caramelized color.
Step 8: Cool Before Slicing
Although it may be tempting to cut into your fresh loaf immediately, allow it to cool on a wire rack for 3–4 hours.
During this time, the crumb finishes setting.
Cutting the bread too early can leave the interior gummy and underdeveloped.
Patience truly pays off.
Serving Suggestions
Fresh sourdough bread pairs wonderfully with almost any meal.
Try serving it with:
- Salted butter
- Homemade fruit jam
- Avocado toast
- Olive oil and balsamic vinegar
- Soup and stew
- Cheese boards
- Smoked salmon
- Grilled sandwiches
- Garlic bread
- Bruschetta
Its chewy texture and crisp crust make it perfect for both sweet and savory dishes.
Storage Instructions
Store your sourdough loaf at room temperature in a paper bag or bread box for up to 4 days.
Avoid refrigerating it, as refrigeration speeds up staling.
For longer storage:
- Slice the loaf.
- Freeze individual slices.
- Toast directly from frozen whenever needed.
Properly stored sourdough freezes exceptionally well for up to 3 months.
Tips for Perfect Sourdough Bread
Follow these tips for consistent results:
- Always use an active and bubbly starter.
- Measure ingredients by weight instead of volume.
- Be patient during fermentation.
- Watch the dough rather than the clock.
- Keep your Dutch oven thoroughly preheated.
- Score confidently to control expansion.
- Let the bread cool completely before slicing.
Small improvements in technique make a significant difference in the final loaf.
Common Troubleshooting
Why didn’t my bread rise?
Your starter may not have been active enough, or the dough may have been under-proofed.
Why is my crumb gummy?
The bread was likely sliced before cooling completely or was slightly underbaked.
Why is the crust pale?
Your oven or Dutch oven may not have been hot enough before baking.
Why is my crust too thick?
The bread may have baked too long or lost too much moisture during baking.
Can beginners make sourdough?
Absolutely. While sourdough requires patience, each loaf teaches valuable techniques, and your skills improve with every bake.
Nutritional Information
Approximate nutrition per slice (1/12 loaf):
- Calories: 180
- Carbohydrates: 37g
- Protein: 6g
- Fat: 0.5g
- Fiber: 1.5g
- Sodium: 325mg
- Sugar: 0.2g
Nutritional values are estimates and may vary depending on ingredients and serving size.
Frequently Asked Questions
Can I make sourdough without a Dutch oven?
Yes. While a Dutch oven creates the best steam for crust development, you can bake on a baking stone or tray with a pan of hot water in the oven to generate steam.
How do I know my starter is ready?
A healthy starter should double in size after feeding, appear bubbly, and pass the float test.
Can I use all-purpose flour?
Yes, but bread flour provides stronger gluten development and better oven spring.
How long does homemade sourdough stay fresh?
It remains fresh for about four days at room temperature and freezes well for several months.
Is sourdough healthier than regular bread?
Many people find naturally fermented sourdough easier to digest, and the fermentation process can improve flavor and nutrient availability. However, nutritional value depends on the ingredients used and portion size.
Final Thoughts
Baking homemade sourdough bread is more than simply following a recipe—it’s an enjoyable craft that combines patience, technique, and tradition. Every loaf is unique, and each bake helps you better understand the fascinating relationship between flour, water, salt, and wild yeast.
While the process takes time, the reward is a stunning artisan loaf with a crisp crust, an airy crumb, and a deep, complex flavor that simply can’t be matched by commercial bread. Whether you’re baking for your family, sharing with friends, or simply enjoying the satisfaction of homemade bread, this sourdough recipe is one you’ll return to again and again. With practice and patience, you’ll soon be producing bakery-quality loaves right from your own kitchen.

Leave a Reply